Saturday, April 30, 2011

Mother’s Day Card


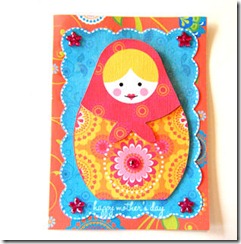
20110430_19Here is a quick Mother’s Day card I made this afternoon using the All Wrapped Up Cricut Imagine cartridge. This is a card that is on the cartridge. The Imagine cartridges don’t have the typically creative features like the regular cricut cartridges do. I cut this card at 5 1/2” which gave me a wide of 8” so my finished card size is 4” X 5 1/2 and will fit in a regular A2 envelope. I left all the colors as they were in the book and used the layer feature to cut the images. I scored and folded the card base. Before adhering the blue scalloped layer I lightly sprayed it with some Electric Blue glimmer mist to give it some sparkle which doesn’t show up well in the photo. After it dried I adhered it to my card. I adhered the layers of the Babushka doll with pop dots except for the center of the flower under the scarf. To finish the card I used my white gel pen to add some faux stitching along the edge of the blue scallop mat. I also added some dark pink rhinestone flowers to the corners of the scallop and a dark pink rhinestone gem to the center of the flower. I stamped my sentiment Happy Mother’s Day in white pigment ink. I am really loving the bright colors on the All Wrapped Up Imagine cartridge. Thanks for visiting.

Sunday, April 24, 2011

Mom's Day Card - Cutters Creek Treat Design Team Challenge

A few weeks ago, Kim the owner of the online store Cutter's Creek sent each of her Design Team Members a treat, a product from Cutters Creek. This is what I came up with using the Cutters Creek Branded Micro Roses she sent.

My card base is Kraft card stock cut and folded to make a 5" x 7" card base. I used Lori's Garden Imagine cartridge and the 5:7 rectangle stock image one sized at 5" and flooded with the orange and brown pattern and one sized at 5.2" and flooded with a dark apricot color. I cut the the solid color mat to 4 3/4" X  6 3/4" and punched it with a scallop border punch. I then cut the patterned paper to 3 1/2" Xx 6 3/4" and adhered it to the apricot piece with my ATG gun. I added a piece of white lace trim. For the rose bushes I used the Freshly Picked Cricut cartridge, my Gypsy and the Imagine app. Again all colors are from Lori's Garden and the bushes were cut at 3.6". Instead of cutting the roses and the ribbon I gently removed the bows from the little flower bouquets, and using some small wire cutters snipped the roses from the wire. I attached the roses to the bush with some small glue dots and also the ribbon. The bushes are attached to the card base with foam tape. I inked around the edges of all the parts of the rose bush using some Tim Holtz Distress Ink in Tea Dye. My sentiment was stamped with Walnut Stain distress ink. I added some brown pearls as a finishing touch.

To see the projects the other Design Team members came up with please visit the Cutters Creek Design Team Blog. The Design Team came up with some wonderful projects so I hope you pay us  visit and let us know what you think.

All Wrapped Up Boxes

I just got the Cricut Imagine cartridge All Wrapped Up in the mail yesterday and was anxious to try it out. So this morning I made a couple of the boxes. I used the layers feature and fit to page to cut the boxes. They aren't very big but fit some small Easter candy bars in them. I was able to get for candy bars in each box.

The cartridge prints out a dotted score line so you know where to score and fold your boxes. These went together really quickly. I love the bright colors and patterns on the cartridge and hope to get a chance to play  more with it soon. Hope you all have a great Easter.

Happy Easter

Just wanted to wish everyone a very Happy Easter for those that celebrate. For those that don't, I hope you have a great day.

Monday, April 18, 2011

Easter Bunny Card

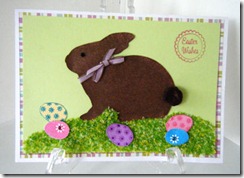
Easter Bunny Card Here is a card that I made as my first Cutters Creek Design Team Cutters Creek Design Team Blog member. If you haven’t been to the blog or the store I suggest you check them out.  With Easter just a few days away, I made this cute Easter card for you. My card base is white card stock cut at 7” X 10” and scored at 5” and folded to make a 5” X 7” card base. I then used some scraps from my stash to cut a 4 ¾” X 6 ¾” mat out of plaid paper. The green mat is also from my stash and was cut at 4 ½” X 6 ½”. My bunny was cut at 3” out of brown card stock from the Easter 2010 seasonal Cricut cartridge. To make my bunny really stand out, I sprayed him with some Coffee Shop Glimmer Mist then let him dry. Once was dry I adhered him to my card with my ATG gun.
Once my bunny was attached to my card I decided he needed some grass so I pulled out my Flower Soft. I started with drawing a line with my Flower Soft Adhesive underneath my bunny and applying some Meadow Flower Soft. Working in sections, I then filled in the area from under the bunny to the bottom of my green mat with adhesive and applying the flower soft. Once I had the flower soft all over the adhesive I pressed down on it gently with my hand to make sure it was well adhered to the glue. I let it dry for a few minutes and then gently taped off the excess flower soft.
Now my bunny needed some Easter eggs. I again pulled out some scraps of paper and a couple of small egg stamps that I picked up last Easter. I used some Memento Ink to stamp my eggs. The colors I used were Rosebud and Bahama Blue ink to stamp my eggs. For the purple egg, I used some watermark ink. I hand cut the eggs out using a small pair of scissors. To bling up my eggs I add some Turquoise, Glam Pink, and Purple stickles. On the solid eggs I added some matching colored iRoc gems to the center of the flowers and a black gem to the eye of the bunny. Once my eggs were all decorated and dry and attached them to the grass with my Flower Soft Adhesive.
To finish my card I added a brown pompom that I lightly sprayed with the Coffee Shop Glimmer Mist to the tail of my bunny, tied a narrow purple ribbon around his neck and stamped my sentiment with Rosebud Memento Ink.

Sunday, April 17, 2011

Card Using Lori’s Garden

20110417_4 I have 4 or 5 more birthday cards to do in the next 2 weeks as well as several Mother’s Day cards to make. So today I put this card together but I’ve left off the sentiment until I decide what I am going to use this for.

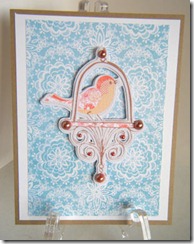
My card base is Kraft cardstock cut and scored to make a 4 1/4” X 5 1/2” card base. I then cut a white mat 1/4” smaller than my card base. The blue patterned paper was printed out using the Lori’s Garden cartridge and my Imagine and cut to 3 3/4” X 5”. Using Lori’s Garden and the layers feature I cut the bird out at 3”. I glued all the layers together and then pop dotted it to the card front. To finish it off I added some copper colored pearls to the bird cage to add some bling. Using the Imagine I was able to create this card in record time which is good. I was really lacking energy and motivation today, not sure why. Thanks for visiting.

Sunday, April 10, 2011

Paper Playtime Challenge #43

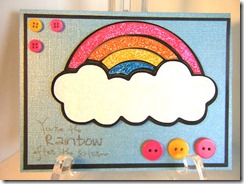
 20110403_4 The challenge this week at Paper Playtime is to make a project using a weather related element such as the sun, clouds, rainbow, rain.  This is what I came up with for you.

My card stock is from Core de’ nations Gemstone collection. My card is 4 1/2” X 6”. I added a black mat cut at 4 1/4” X 5  3/4” and a blue mat cut at 4” X 5 1/2”. My rainbow is from the Hello Kitty Greetings Cricut cartridge. I cut the rainbow and its layers at 3”.  I used Glam Pink, Yellow, Orange, and True Blue stickles on each of the stripes of the rainbow and let it dry overnight. I also used some Distress Rock Candy stickles on the clouds but it doesn’t show up in the photo very well.  My sentiment is from The Greeting Farm and says You’re the Rainbow after the storm. To finish the card I added some bright pink and yellow buttons to the lower right hand corner and upper left hand corner of my card. The buttons were adhered with glue dots.  Thanks for visiting and I hope you play along with the challenge at Paper Playtime.

Thursday, April 7, 2011

Everyday Pop Up Card

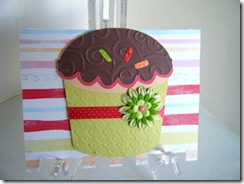
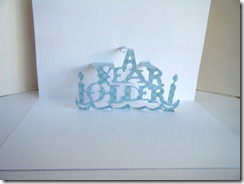
20110407_1 I had a chance to try out my new Everyday Pop Up Card Cricut Cartridge this morning. Got to love some days off of work! Any how, this cartridge was a bit of a challenge for me and I don’t think I have it quite figured out yet. With 6 birthdays over the next several weeks in my family I opted to try one of the birthday cards on the cartridge.  Here is the first card I made with the cartridge. I opted to use the pop up phrase inside and put a cricut cut on the outside of the card.

All of the cuts I used are from page 61 of the handbook. I used colors and patterns from the Yummy Imagine cartridge and cut everything on my Imagine. I cut the card base at 5 1/2”. I cut the cupcake and it’s layers at  4”. I think my cupcake is a little too big but didn’t have time to redo it. I ran the layer for the wrapper through the cuttlebug and I believe that is the herringbone pattern embossing folder. I also ran the chocolate frosting layer through the cuttlebug and embossed it with the swirls embossing folder. I adhered everything together and and added some Firefly, Fruit Punch, and Tropical Tangerine stickles to the sprinkles.  To finish off the cupcake I wrapped some dotted ribbon from my stash around the cupcake and added a flower.

20110407_6

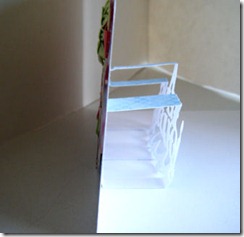
For the popup inside, I wasn’t sure what size to cut it but also cut it at 4”. I flooded it with a blue pattern from the Yummy cartridge. There were no real score marks on the tabs that cut attached to the words so it was a little bit of a guess as to where to fold them. The bottom of this cut is fairly lacey and didn’t fold real well. I used Scor-Tape on the tabs to adhere it to the card.

20110407_9

Overall I am pleased with how it turned out. I will be playing with this more and would like to try out the image pop up next time.  I do think there were easier images to try as the first time but you know me, never can seem to do anything that is too easy.

Wednesday, April 6, 2011

Elegant Edges Birthday Card

20110406_4 I received my Elegant Edges Cricut Cartridge this week and had a chance to try it out today. I made this birthday card for my sister whose birthday is Saturday.

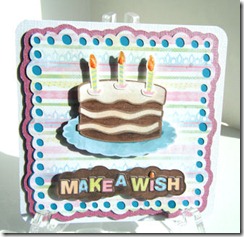
I started with a 5 1/2” square card base made from white card stock. I rounded the corners of the card base. I used the image from page 34 of the hand book, Dots1. I cut the shadow from some pink card stock in my stash. I then flooded the top layer with a pattern from the Yummy Cricut Imagine cartridge and the second layer with a dark turquoise blue from the Yummy color palette. I cut all these images at 5”. My cake and sentiment are also from the Yummy Imagine cartridge. I used the layers feature to cut the cake and candles at 3”.  I cut the Make a Wish also using the layers feature at 1”. I sprayed the chocolate part of the cake with some coffee shop glimmer mist and the frosting layers with some old lace and pearl glimmer mist sprays. I also sprayed the background on the Make a wish with the coffee shop glimmer mist. Once the glimmer mist dried and glued all the layers together. I pop dotted the mat I cut from Elegant Edges to my white card base. I also pop dotted the cake and sentiment to the card for added dimension. I am not having to mail this card so am not worried about the added height on the card.  I added some yellow and orange stickles to the candles so they sparkled.

This cartridge has so many great cuts on it. I am sure I will be using it often. Thanks for visiting.

Saturday, April 2, 2011

Flower Card


For this card I used the Birthday Bash cricut cartridge for my card base which I cut from white card stock at 5 1/2".  I cut the tag layer also at 5 1/2" and flooded it with a pink patterned paper from the Lori's Garden Cricut Imagine cartridge. My flower is from Forever Young. I used black for the shadow, green for the base layer, a hot pink for the base layer of the flower, white and a lighter pink for the last two layers. The flower was cut at 4.2". I ran the white and light pink layers through my Cuttlebug and embossed them with the swiss dots folder. The flower is adhered to the card with foam tape. I added a brad to the center of the flower from the My Minds Eye Lost and Found Madison Avenue Happily Ever After brad set. I am entering this card into the Pink, Black and White challenge at Pause Dream Enjoy. The card was a lot of fun to make. Thanks for visiting.

Friday, April 1, 2011

May Your Dreams Take Flight

20110401_4
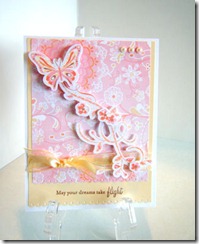
My niece leaves at the end of April for 27 months in Guatemala through the Peace Corp. This is the card I made for her send off party in another week. I was very excited to get my Lori’s Garden Cricut Imagine cartridge this week and new this image would be perfect for the card.
I started with a white card stock base scored and folded to 5 1/2” X 4 1/4”. This is a portrait card. I used my imagine and the color and patterns pallets on the cartridge to bring a yellow mat and a pink patterned paper mat. The yellow mat was cut  5 1/4” 4 1/4” and I then used a small scallop border punch by EK Success to punch the bottom of the yellow mat. For the pink patterned paper mat I cut it to 5” X 3 3/4” and used the same border punch. I added a butter yellow sheer and satin ribbon to the lower part of my card. I cut the butterfly using the layers feature at 4”. I used pop dots between the layers and added the entire image to the card with pop dots as well. My sentiment says May your dreams take flight. I added some pearls to the upper right hand corner of the card. The card went together fairly quickly. Thanks for visiting.