
Saturday, August 27, 2011
Wish Upon a Star Challenge
Friday, August 26, 2011
It's a Jungle Out There!
The challenge this week over at Cricut Cardz Challenge Blog is to make a child's birthday card using something you might see in the jungle. I decided to go with the elephant from the Birthday Bash cricut cartridge.

My card base is a 8 1/2" X 5 1/2" Kraft card stock that I scored and folded to make a 4 1/4" X 5 1/2" card. I used my corner rounder and rounded the two lower corners. I added some aqua and white striped twine. I cut my elephant and all his layers at 3". The polka dot paper is from Echo Park. The other colors are were printed on my Imagine from the Best Friends cartridge. I put some small pieces of foam tape behind his ear so his ear would stand up a little. I also attached the elephant to the card with foam tape. I added some white doodles along the edges of the card and stamped Happy Birthday in Walnut Stain Distress ink. Thanks for visiting.
Wednesday, August 17, 2011
Celebrate the Season
So I strayed away from our Flower Soft theme this post but I have been wanting to make a card with this wonderful POW! Glitter Paper so I opted to do a Christmas card. It is never too early to get started on those cards.

I started with a 5" X 10" piece of white card stock scored and folded to make a 5" X 5" square card. I used my Scor Pal to score lines in my card front at 1/2" and 1/4". Next I cut another piece of white card stock 3 3/4" X 3 3/4" and liberally sprayed it with some of my Dazziling Diamonds Glimmer Mist and let it dry. I then embossed this square with my Snowflake Embossing Folder and my Cuttlebug and adhered it to my card. I then used two colors of the Pacific and Silver POW Glitter Paper. This paper cuts beautifully with my Cricut. I cut my snowflake using the Winter Lace Mini Cricut Cartridge at 3 1/2". I added the snowflake to my card front with some foam tape and stamped my sentiment. I wish the photo showed off the sparkle of this paper better. If you haven't tried this glitter paper I urge you to give it a try.
I started with a 5" X 10" piece of white card stock scored and folded to make a 5" X 5" square card. I used my Scor Pal to score lines in my card front at 1/2" and 1/4". Next I cut another piece of white card stock 3 3/4" X 3 3/4" and liberally sprayed it with some of my Dazziling Diamonds Glimmer Mist and let it dry. I then embossed this square with my Snowflake Embossing Folder and my Cuttlebug and adhered it to my card. I then used two colors of the Pacific and Silver POW Glitter Paper. This paper cuts beautifully with my Cricut. I cut my snowflake using the Winter Lace Mini Cricut Cartridge at 3 1/2". I added the snowflake to my card front with some foam tape and stamped my sentiment. I wish the photo showed off the sparkle of this paper better. If you haven't tried this glitter paper I urge you to give it a try.
Sunday, August 14, 2011
Thanks Card

Monday, August 8, 2011
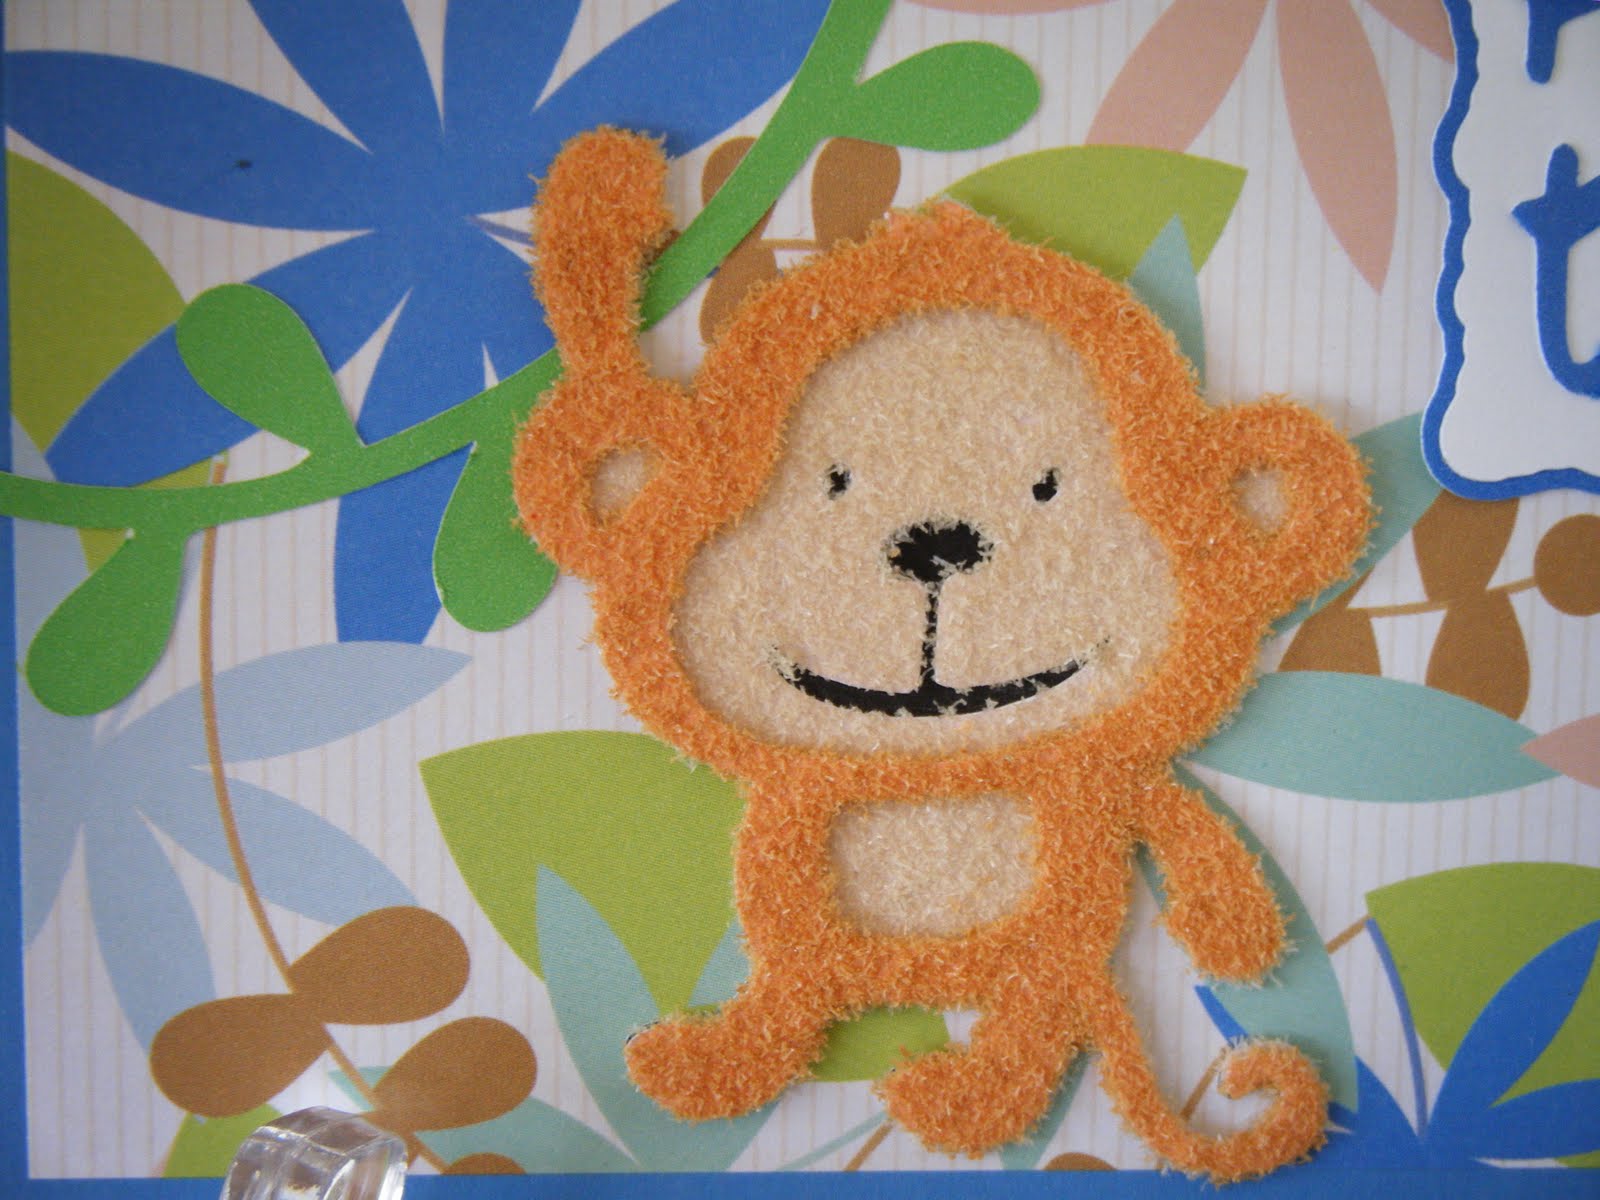
Hang In There Card

This week my Cutters Creek Design Team post is for Tuesday Tutorial using Flower Soft. The tutorial I have for you today uses the Ultra Fine Flower Soft as flocking. I love the dimension and texture it gives to my Cricut cuts. I started with the monkey from the Create-a-Critter cartridge and cut him at 3". I used my Imagine to color each layer (love that!). The base layer was cut with black. The next I colored to match as close to the flower soft I chose to use.


Sunday, August 7, 2011
Let the Fun Begin!

My card base is 4 1/4" X 5 1/2" white card stock. My patterned paper is by Echo Park. I cut the cloud paper 3" X 5 1/2" and the green paper 1 1/2" X 5 1/2". I used the layered feature on my Imagine and cut the girl in the pull image at 3". I also cut the sun image from the same cartridge at 1 1/4". I added some yellow stickles to the sun rays and some Glossy Accents to the lenses of the sun's sunglasses. Thanks for visiting and I hope you will join us in the challenge at Paper Playtime.
Subscribe to:
Posts (Atom)