Wednesday, February 27, 2013

New Crafty Cardz Challenge

It is time for a new challenge over at Crafty Cardz Challenge . The new challenge is to make a Child's Birthday Card!! Here is what I came up with.

My card base is Kraft card stock cut and folded to make a 4 1/4" X 5 1/2" card base. I added a bright green mat cut at 4" X 5 1/4" and then the patterned paper mat cut at 4 1/8" X 5 1/8". I wanted just a little of the green to show up.I then added a small strip of orange to the card that I cut at 1" and then trimmed on edge with some decorative scissors. My Dinosaur is cut from the Create-A-Critter at 3 1/2"  and added to my card front with some foam tape. I then cut a start shape at 2" using the shadow feature on Accent Essentials and a 1 1/4" circle also from Accent Essentials. Stamped my sentiment with some lime green ink and adhered it directly to my card.

Now it is your turn. I hope you will join us in the challenge.

Saturday, February 23, 2013

Giveaway Winner!!!!

And the winner of the My Memories Suite Software  is. . . . . . VICKY WAYNE

Congratulations! I am sure you will enjoy your software.


Friday, February 22, 2013

Lin and Lene Designs Dies

I ordered a couple of adorable dies by Lin and Lene Designs and they came yesterday. This card is what I made with one set of the dies.

Want to see them? Here you go.


Now on to my card.  I started with a kraft card stock card base cut and folded to make a 4 1/4" X 5 1/2" card. I added a white mat cut at 4" X 5 1/4" and then the blue gingham mat (from a My Minds Eye paper pad) cut at 3 3/4" X 5".  I used a black fine tip marker to add some faux stitching lines around the white mat of my card.

Using my eBosser I cut and embossed the two dogs from the set. These dies are stencil dies so once they were cut and embossed I used some black soot Distress Ink to ink over the openings in the dies to add some color. I also used a turquoise colored marker to add the blue color to the one dog. This was actually pretty quick and easy to do. I added them to my card front with some foam tape. I then cut a conversation bubble using my Silhouette Cameo and stamped my sentiment in it. I used my black marker to add some doodle lines to the conversation bubble and adhered it straight down to my card with my ATG gun. To finish the card I added 3 small black buttons to the lower right hand corner. I made this card for male co-worker who has a birthday in about 10 days. 

I had hoped to have the kitties done too today but my little helper has been a tad hyper, but shhhh... he is asleep right now.

Tuesday, February 19, 2013

Washi Tape Technique and Card

I wanted to share the technique I used to make the flower on this birthday card. For all of you in the Cutters Creek Washi Tape club or Adhesive Club (even better, both!) should like this one as it uses Washi Tape and Inkssentials Glue n Seal. I love this adhesive. A co-worker is redoing her bathroom in black and white tile and her favorite color is red so I decided to incorporate all 3 colors into a birthday card for her. My card base is white card stock cut and folded to make a 4 1/2" X 6" card base. I added a black mat cut at 4 1/4" X 5 3/4" and then another white mat cut at 4" x 5 1/2" and finally a black patterned paper mat cut at 3 3/4" X 5. My flower is die cut using a sizzix die and I embossed the sentiment with some WOW! Opaque Bright White embossing powder. (it is currently sold out but I am sure Kim will be adding more to the store soon). I added a black stitched white ribbon and tied a knot bow on it.
For the flower I cut a piece of white card stock big enough to fit my die and lightly coated it with some Inkssentials Glue n Seal. I then added rows of Washi Tape to my card stock in a diagonal pattern (just because I wanted to).
Here is a short video showing you how I did this.
On my original sample I cut the excess Washi Tape off, in the Video I did not. However I think it is better to cut the excess of. To finish my flower I added some Kool Tak clear adhesive foam squares between my layers of my flower as well as to adhere the flower to the card. For the center of my flower I first added a 3d Glue Dot to the center. Then I took another 3d Glue Dot and dipped into some Strawberry Ultra Fine Flower Soft and attached it to the glue dot already in the center of the flower. To finish the card I also added some white faux stitching with my white gel pen. As I said in the video, I think this would be a great technique for a background mat on a card as well. I sure hope you will give this technique a try.

Saturday, February 16, 2013

Distressed Card

I received some new WOW! stamps and of course I had to try them out. The sets I bought were Everyday Sentiments, Funky Border Strips and French Music. This is what I came up with. This card style is a bit out of my comfort zone, I don't make a lot like this one. However, I had a lot of fun working on it.

My card base is a light tan card stock cut and folded to make a 4 1/4" X 5 1/2" card base. I added a dark brown mat cut at 4" X 5 1/4" from the Tim Holtz Nostaglic Collection Core'dinations card stock. And another tan mat cut at 3 3/4" X 5".

For my final layer, I started with some white card stock cut at 4" X 5". I used some Tim Holtz distress ink in old paper, antique linen, tea dye, and vintage photo to ink up my paper. I started with my lightest color and worked my way to the darkest color layering the color as I went. I then lightly spritz the paper with some water and allowed it to dry. Next I took some of the Tim Holtz Distress Stain in tarnished brass and inked around outer edges of my paper. I allowed it to dry for a few minutes then turned the paper over and spritzed it with water until it was fairly damp and then crumbled it all up. I spritzed from the back so my ink on the front wouldn't react to the water. I carefully opened up the paper and dried it with my heat tool. Once it was dry I took my blending tool and some Vintage Photo and lightly went over the top of my paper to enhance the wrinkles I had created.

Using Vintage Photo and the French Music stamp I stamped the inked paper. Because of some of the creases, and wrinkles I got a very broken up image which was what I wanted. I then cut it down to 3 1/2" X 4 3/4" so it would fit the front of my card. I took my scissors and distressed the edges of the paper and the adhered all my layers together.

I wanted my sentiment to be the focal point of my card. So using my Cricut and the Elegant Edges cartridge and the Oblong creative feature I cut a scallop and shadow at 3". The shadow was cut out of the dark brown and the top layer was cut out of the light tan.

I inked the edges of the tan scallop with some Tea Dye Tim Holtz Distress Ink and used Vintage photo to stamp my sentiment. Because this ink lightens a bit when it dries, it was a perfect choice to use with the sentiment to carry my distressed theme.

I added some rhinestone flourishes to the front of my card. These were actually clear rhinestones that I colored with a Spectrum Noir marker GB10.

My flowers are a 3d Rose cut that I cut with my Silhouette Cameo. The paper is Core'dinations Gemstone card stock, but not sure of the name of the color but it is a light golden  yellow.

I rolled my flowers and adhered a gold pearl in the center of each flower. I didn't have enough small gold pearls to trim my scallop so I used some Gold Pearl Liquid pearls for that. I adhered the sentiment mat to my card using some foam tape.

I hope you like it. I had a lot of fun working on this one as it was a bit more of a challenge for me.

Thursday, February 14, 2013

A Gift and a Giveaway!

I have had an opportunity to play around with the My Memories Suite V4 software. What a lot of fun! There is just so much you can do with this software and I have just barely scratched the surface.

With digital scrapbooking  becoming so popular this software sure makes it easy. I am not a scrapbooker, in fact I have never created a scrap book page at all. I did my first one with this software. This is what I made.


I had a great subject don't you think? This is our new puppy. We have had him now for about 2 weeks so of course he is a bit bigger now. That's for another page.

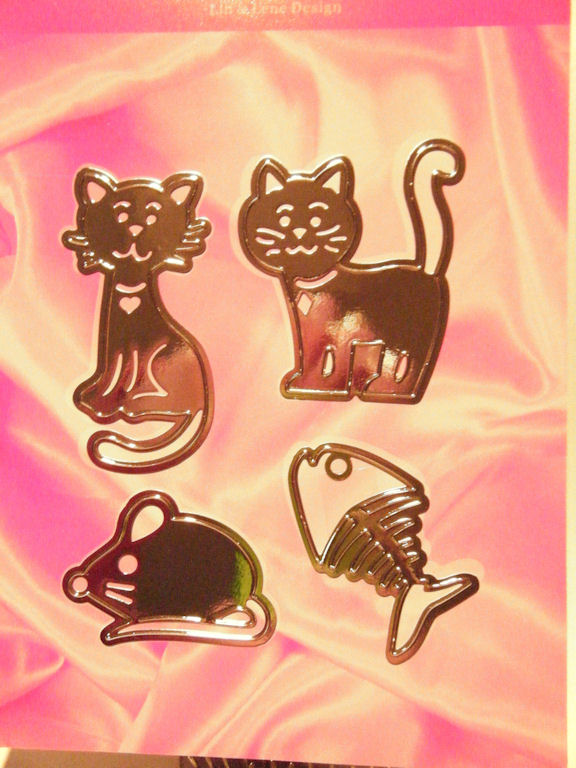
I also created this card front. using the digital software. The only issue I had was there is a way to edit the shapes in the software. To get that feature to work for me I had to run the software as an administrator. From what I heard from tech support is this is pretty common for windows problems and a very easy fix. Tech support has been great to work with as well.

The final item I have created to share with you is this blog button.
Using this software made it really very easy to create. I want to try to make a header for my blog soon and then try to do some backgrounds to match.

My Memories Suite has a lot of great tutorials out on youtube. Here is a link to their channel. I found watching the videos very helpful as I started using the software. I still have more to watch and learn and I got some great tips and tricks and learned things about the software I didn't discover on my one. I have big plans to continue to explore this software and gain the skills and knowledge to fully enjoy this software. I sure hope you plan to join me in my adventure.

I think the one biggest point I want to make with the all of you is that this software is way beyond just for scrap booking. You can create all kinds of custom pages and elements for your projects.

So now for the gift for all of you. To help you get started on your own adventure I can now offer you a $10 discount off of this software. Click the link below and enter my code
STMMMS30550 to get your $10 off. It is as easy as that. And you can be creating scrapbook pages, cards and other digital elements within minutes.
And NOW for the Giveaway! I also have a copy of this software to giveaway! How fun is that!!!!!

To enter the giveaway please go to the My Memories Suite website and tell me what your favorite kit is. You will have until Friday, February 22nd to enter the giveaway! Just leave me a comment with your favorite kit and a way to get in touch with you and I will use Random.org to pick a winner!!!

Have a Happy Valentines Day everyone!


Wednesday, February 13, 2013

Crafty Cardz Challenge


Hi, everyone! I have some exciting news for you! 
Mary @ Cardz TV has decided to change one of her challenge types.
Formerly known as Cricut Cardz Challenge (CCC)
will now be officially
CRAFTY CARDZ CHALLENGES (CCC)!
Woo-Hoo!
That means all of you who have
Big Shots
Cut with Cuttlebugs
Cricuts
Cameos
etc,
who like to use
Digis
Stamps,
etc,
Will be able to play and participate in our CARD challenges!! Awesome!
Here is the challenge that starts today:

Critter Cutie - Make a Valentine's Day card using a Critter. Here is what I came up with:
I used the Love Piggy from the Silhouette store and my Cameo to cut this cute little piggy. I also used the Print and Cut feature on my Cameo. I flood filled each of the layers with a different color for the top layer I used a pattern, all of these were available in the design software.

My card is a white card stock base cut and scored to make a 4 1/4" X 5 1/2" card. I added a red mat cut at 4" X 5 1/4". My patterned paper mat is cut at 3 3/4" X 5" and is from an American Craft paper pad.

We  hope you will come play with us.

Saturday, February 9, 2013

Cutters Creek Design Team Call

Cutters Creek Design Team Call
Cutters Creek is looking to add some members to its Design Team. The Design Team call will run February 10th through March 2nd.

Design Team: (initial requirements)
1. Must live in the US.
2. Submit a paragraph why you would be an asset to the Design Team and your experience.
3. Submit a picture of a scrapbook layout, card, or project show casing your work and describe it as well as a link to your blog.
4. Commit to submitting a minimum of two projects a month as well as blog hops and other special events hosted by the design team and be willing to let Cutters Creek display your art. (You will receive credit for your creation.)
5. Must be able to communicate well with others.
6. Must have a blog

To view the Cutters Creek store site please go here. To view the Design Team blog please go here.
We are looking for submissions by all skill levels. Submissions can be emailed to cutterscreek@gmail.com no later than Saturday March 2nd midnight EST.

If any of the above requirements cannot be met, please do not submit an entry.

Other compensation and requirements will not be discussed until the above items have been met, as this will be a two phase process.

Thank you for your consideration!!! I thank you in advance for your submission.

Thursday, February 7, 2013

Valentine's Day Treat Bag


With Valentine's Day fast approaching I figured I better get some treat bags put together to give my family member. This is what I came up with

The little tote box came from the Silhouette Store and was cut with my Cameo. It was a quick and easy little box to put together. It cuts in one piece. I just folded along the score lines and used some Zip dry to glue the sides to the front and back. I put some Dove's chocolates in a clear bag, and added a ribbon tied in a bow.

Monday, February 4, 2013

A New Challenge at Scrappy Frogs


It's time for a new challenge over at the Scrappy Frogs Challenge Blog. The challenge is to make a project and you have to use pink or red somewhere on the project. This is what I came up with.

My card is a 5" X 7" white card base. I added a red mat cut at 4 3/4" X 6 3/4" then a patterned paper mat cut at 4 1/2" X 6 1/2". My image is cut with my Silhouette at the default size it came up with. I used foam tape to attach the wings to the birds. To finish, I took my white gel pen and added some faux stitching and stamped my sentiment with some Memento Tuxedo Black ink.

I sure hope you will play along with us.

Friday, February 1, 2013

Painting With Liquid Pearls

So when I was sick last month I spend a lot of time just watching card making youtube videos. I found a couple of videos the used liquid pearls to paint with and of course I had to give it a try. I used my eBosser and the magnetic mat to die cut my violets. I then ran them back through the eBosser after removing the magnetic mat and topping the die with the rubber embossing mat and embossed them. It worked wonderfully. To paint my violets I first laid my craft mat down. I then put some of the Squeezed Lemonade distress ink on my mat then I squirted a little dab of the Daffodil and White Opal liquid pearls in the center of the distress ink. I think added some water with a misting bottle just to the side of the ink and liquid pears. Using my brush I I mixed the ink and liquid pearls together adding a bit of water as I went. Then I painted it on the center of my violets and let them dry. After they were dry I used some Seedless Preserves distress ink and some Majestic Purple and more of the White Opal liquid pears and repeated the mixing process and then painted that color to the outer edges of my violets and then let them dry. For the stems and leaves I used Mowed Lawn distress ink and Avocado and White Opal liquid pearls. Again I mixed them together and added water to get the colors I wanted. Added the color to my leaves and stems and let them dry. While they were drying I put my card base together. I started with a white card stock card base cut, scored and folded to make a 4 1/4" X 5 1/2" card base. I cut a lavender mat at 4" X 5 1/4" and the patterned paper mat at 3 3/4" X 5". My patterned paper is from a Prima paper pad. Next I used my Elegant Edges Cricut Cartridge to cut out a scalloped mat and it's shadow for my violets to be placed on. The mat was cut at 3". I ran the lavender mat through my eBosser and embossed it with the Swiss Dots Cuttlebug folder. I added my violets to the mat and attached it to my card with some foam tape. Finally I cut out a zigzag border using yellow and dark purple card stock my Silhouette Cameo and adhered them to my card. I added some Lavendar Lace Liquid Pearls to the dark purple card stock. I stamped my sentiment with the Seedless Preserves . Finally I added some Lemon colored Kaisercraft Pearls to the centers of my flowers.