Calling all Kid Crafters!!!! Cutters Creek Design Team
is please to offer you the opportunity to show off your crafting talent and have
a chance to win some wonderful goodies too!!!
Our challenge to you is to make a project, any
project and post it to our blog through the Mr. Linky provided on the Design
Team blog. Your project can be anything you want, a card, a scrapbook page. . .
We would like you to use at least one product that is sold by Cutters Creek. The
contest runs between August 1st and August 15th. We will draw one winner from each
of the age groups below using Random.org and they will be announced here on
August 18th. When posting your project to Mr. Linky please include your name and
age so we can be sure we get you in the right group for the drawing.
The age groups are:
1 thto 7
8 to 11
12 and older
Want to see what you could win? Then hop on over
to the Cutters Creek Design Team blog for a peak at the prizes. You can link you
your project up at the Design Team blog too! So get your creative thinking caps
on and start creating. we are excited to see what you make!!!!!! If you need
help with posting your project to Mr. Linky please email me at deannamulder @
live.com
Tuesday, July 31, 2012
Ecstasy Craft Cards
I have another sneak peak for you of some of the awesome holiday Ecstasy Craft items that Kim will be adding to the store very, very, soon!!!
 These are called Reddy Die-Cuts. As you can see I got 4 cards from one package. As you can see they come with a background paper to build your image on. Building the image is easy as 1,2,3. All of the punch out items are numbered in the order that you layer them. It took me just about an hour to make all 4 cards which is fast for me. The individual card toppers measured just under 4" so I cut 4 white card stock card bases at 4 1/4" X 8 1/2" and scored and folded them to make four 4 1/4" square cards and rounded the corners. These will fit in a standard size A2 envelope so you won't have to pay extra postage to mail a square card.
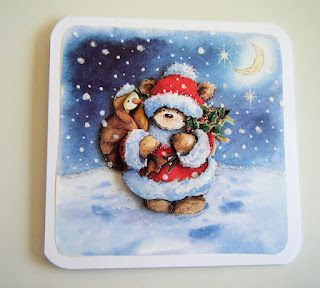
 On this little guy I added some Frosted Lace Stickles between the snowline and the sky and also on the 4 larger snowflakes. (sorry it doesn't show up better in the photo).
 On this one I again added some Frosted Lace Stickles to the snowline and I also added some Stardust Stickles to the stars by the moon.
 For this one I added some Ultra Fine White Flower Soft to the snow along the top of the fence and also to some of the snow on the tree limbs.
 On this one I again added some Stardust Stickles to the fireworks in the sky.
Check out the dimension you get with these wonderful little layered images.These were quick and easy to make and are beautiful as is without any additions. It is a fun and quick way to make some cards to give as gifts or to mail to family and friends.
On this one I again added some Stardust Stickles to the fireworks in the sky.
Check out the dimension you get with these wonderful little layered images.These were quick and easy to make and are beautiful as is without any additions. It is a fun and quick way to make some cards to give as gifts or to mail to family and friends.
 There are some great new Flower Soft products that have been added to the store just in time for your holiday crafting so be sure to check them out. Also be sure to check the new CHA 2012 Release section of the store to find out the latest and greatest additions including these wonderful Ecstasy Craft items.


Friday, July 27, 2012
Wedding Card

I cut my card base using the Sophie cartridge at 5 1/2". I used my Gypsy to hide the cut out that was on the front of the card. I then cut the layer at 5 1/4" so it was just a little smaller than my card base. My card base once folded measures 5 1/2" X 4 1/2" so it will fit in some invitation envelopes I picked up at Walmart awhile back. I embossed this layer with the three dots folder I have from Sizzix. I added this layer to the card front with some foam tape. I spritzed this layer and my white bride and groom with some Dazzling Diamonds Glimmer Mist which gave it a light gold shimmer.
I cut my bride and groom from white cardstock at 3 1/2" and the shadow out of black and adhered them together. I adhered the bride and groom to the card front with some foam tape as well. I then used some White Liquid Pearls to add pearls to the back of the dress, the brides hair and to the scallops on the card. Finally I stamped my sentiment with a CardzTV stamp and adhered that to the card front with some foam tape as well and then added a sheer white ribbon tied in bow to the fold of the card.
I am entering this card in the challenge over at Fantabulous Cricut where the challenge is to make a Wedding or Anniversary card. And I am entering it in the CardzTV Design Team challenge which is anything goes.
Tuesday, July 24, 2012
Etching with WOW! Embossing Powder
Today I have another video for you on the WOW! Embossing powder. This video shows you how to do the etching on the dress form skirt. I cut my dress from the Nifty Fifty's Cricut Cartridge at 6 3/4".
My finished card is a 4 1/4" X 5 1/2" white card stock base. I added a black mat cut at 4" X 5 1/4" and a black and white patterned paper cut at 3 3/4" X 5". I adhered my dress form with some foam tape to the front of my card.
 Cutter's Creek Products used in this project: WOW! Embossing Powder Silver Ultra Wooden Manniquen by KaiserCraft Glimmer Glam-Special order item

Saturday, July 21, 2012
WOW! Embossing Powder
Here is a video I did to show you the WOW! Embossing powder. This powder is awesome stuff and I hope you enjoy it.
Wednesday, July 18, 2012
Tag, You're It! Challenge

The new Cricut Cardz Challenge is to make a card using a tag or tags and any cartridge, color and theme you want. This is what I came up with.
I start with a white card stock cut and folded to make a 4 1/4" X 5 1/2" card base. I cut my tag from the Sweethearts cartridge at 5". I used my Imagine and the Floral Emporium cartridge for all my solid colors and patterned papers. My queen was cut at 3 1/2" from the Once Upon a Princess Cartridge. I used a copic marker to add color to her cheeks and I painted the layers of her crown with some Glimmer Glaze. I stamped my sentiment "The Queen Rules" with Memento Tuxedo Black ink. I attached her to the tag with some foam tape and attached the entire tag to the front of my card.
I sure hope you will play along with us for the challenge, it was a lot of fun.
Thursday, July 12, 2012
I'll Be Home for Christmas

Saturday, July 7, 2012
Christmas in July Challenge

Cardz TV is having a Christmas in July challenge. The challenge is to make a Christmas card and use an animal. This is what I came up with.
I started with a Kraft card stock base cut and scored to make a 4 1/4" X 5 1/2" card. My patterned papers are some left over from a stack I got a couple of years ago. The red mat was cut at 4" X 5 1/4" and the green snowflake paper is cut at 3 3/4" X 5". I inked around the edges with some Tim Hotlz Tea Dye distress ink.
My little beaver is from the Winter Frolic Cricut Cartridge. I cut him at 3". I used some Tim Holtz Gathered Twigs ink to ink the beavers tail and stomach pieces. I added some white faux stitching to his hat and scarf and also around the edge of the green mat. My sentiment is from the Cardz TV home for Christmas stamp set and is stamped in some Rich Cocoa Memento Ink. I added a small button in the shape of tree that I threaded with a piece of twine. the beaver is attaqched to the card with some foam tape. Thanks for stopping by.
Sunday, July 1, 2012
Red, White, and Blue Challenge

My card base is 4 1/4" X 5 1/2" white card stock. I added a red mat cut at 4" X 5 1/4" and then the blue dotted paper cut at 3 3/4" X 5". I also added a narrow strip of white cut at 1" X 5" and a red strip cut at 1/2" X 5". My flower is from the Forever Young Cricut Cartridge cut at 3". I ran the white layer through the Cuttlebug and embossed it with the Swiss Dots folder. To finish the flower I added a blue and polka dotted button. I also added some small red and white buttons.
I hope you will hop over to the Scrappy Frogs blog and join us for this challenge.
Subscribe to:
Posts (Atom)