As I said I used the Spellbinder Edgeabilities Decorative Inserts and the Classic Edges Two for the the bee border. My card base is 4 1/4" X 5 1/2" Yellow Core'denations card stock ( suspect Kim can special order this card stock for you). I added a black mat cut at 4" X 5 1/4" mat and then a paper patterned mat from the My Minds Eye Howdy Doody 6" X 6" paper pack cut at 3 3/4" X 5". This paper already had a flower image in the upper left hand corner that worked perfectly with my bee. I cut the bee at 3 1/4" from the Garden Soup Cricut Cartidge (another item that Kim can likely special order for you.) I added my bee border and some black and white gingham ribbon to my card. Then used some foam tape to add my bee to my card and added some buttons from my stash with some glue dots. I am so pleased how this card turned out. Thanks for visiting.
Monday, April 30, 2012
Spellbinders Edgeabilities Dies and Bee Card
As I said I used the Spellbinder Edgeabilities Decorative Inserts and the Classic Edges Two for the the bee border. My card base is 4 1/4" X 5 1/2" Yellow Core'denations card stock ( suspect Kim can special order this card stock for you). I added a black mat cut at 4" X 5 1/4" mat and then a paper patterned mat from the My Minds Eye Howdy Doody 6" X 6" paper pack cut at 3 3/4" X 5". This paper already had a flower image in the upper left hand corner that worked perfectly with my bee. I cut the bee at 3 1/4" from the Garden Soup Cricut Cartidge (another item that Kim can likely special order for you.) I added my bee border and some black and white gingham ribbon to my card. Then used some foam tape to add my bee to my card and added some buttons from my stash with some glue dots. I am so pleased how this card turned out. Thanks for visiting.
Saturday, April 28, 2012
Baby Shower Cards
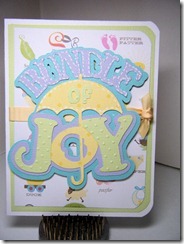
I started with a 4 1/4” X 5 1/2” white card stock base. I then added a green mat cut at 4” X 5 1/4” and then the patterned paper cut at 3 3/4” X 5”. I used a corner rounder to round the two outside corners on each layer. I cut the Bundle of Joy at 3 1/2” from the Everyday Pop Up Cricut Cartridge. I added a light yellow ribbon and pop dotted the image to my card.
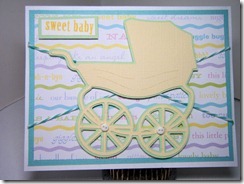
For the second card I again started with a 4 1/4” X 5 1/2” white cardstock card base. I added a teal blue mat cut at 4” X 5 1/4” and my patterned paper cut at 3 3/4” X 5”. I wrapped some teal twine around the card and adhered it to my base. I cut the baby carriage from the Mother’s Day 2010 seasonal cartridge at 3 1/2”. I cut the base layer from green and the top layer from yellow cardstock. I added some tiny white buttons to the center of the wheels and pop dotted the whole thing to my card front. I stamped my image with some yellow ink on white cardstock and cut it down and matted it with some green card stock and then added it to my card with some foam tape as well. I hope she likes them.
Sunday, April 22, 2012
Birthday Card by Deanna M
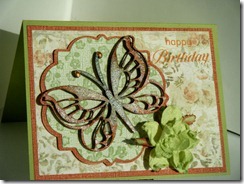
I have for you today a birthday card I made for a friend to give to her Mom. My card base is a piece of green cardstock cut and scored to 4 1/4” X 5 1/2”. I added a mat from the Mod Squad Cut and Emboss paper pack cut to 4” X 5 1/4” and then a patterned paper mat from the Prima Botanical paper collection cut to 3 3/4” X 5. I then used Elegant Edges to cut a mat for my butterfly at 3”. I used the same paper as my first mat for the base layer of the mat for the butterfly. I then used a piece of paper from the Whitewashed Cut and Emboss paper pack for the top layer. I ran that layer through my Cuttlebug and embossed it with Sizzix Embossing folder called Dots and Flowers Embossing folder and sanded it so the colored green core showed through (and yes, Kim can order this for you. You get two folders in the package).
My butterfly on this card is once again one of the laser cut embellishments by Kaisercraft. I am so loving these embellishments. (And, yes Kim can order these for you too!) They are so easy to work with, are not too think and add a great dimension and elegance to a card. For the butterfly I started off by using my craft mat and rubbing some different colors of Distress Ink on my mat, spritzing with water and them placing the butterfly in the ink on my mat. I used Persimmon, Concord Grape and Broken China Distress Ink. I let it dry for a bit then spritzed it with similar colors of glimmer mist. Again I let that dry and then added some Glimmer Glam in Violet and a Copper color. Once again I allowed that layer to dry. I then added some Glimmer Glaze to the antenna’s and around the orange areas of the butterfly. I then went back with a bit more Persimmon distress ink. I let all that dry overnight (only because it was bedtime). The final layer I added some Pearl glimmer mist. This butterfly is so iridescent looking in person. I adhered my the butterfly to my mat with some of the ASI Kool Tak tape clear gel foam tape.
The flower I added to the card is a Cutter’s Creek Gardenia. The flower was actually yellow but it just didn’t go with the card as well as I likes, so I spritzed it with some Honey Dew Mist glimmer mist, and problem solved. It softened the butter yellow of the flower and gave it a light green color which went much better with my card. I then stamped my sentiment with some Rusty Hinge Distress Ink. Finally I added some Copper Pearl liquid pearls to the tip of each antenna. Sure hope you have enjoyed my project and that I have inspired you to get out your goodies and make a project.
Saturday, April 21, 2012
Another Birthday Card
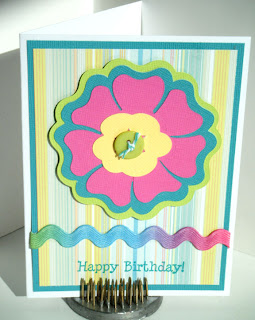
So the majority of my family has birthdays in April and May so I have a lot of birthday cards to get made. I made this birthday card with the Cardz TV Design Team challenge in mind. The challenge is Over the Rainbow, to make a project using Pink, Green, Blue and Yellow only with limited amounts of white and black allowed.
My card base is white card stock cut and folded to 4 1/4" X 5 1/2". I added a dark teal blue mat cut at 4" X 5 1/4". My striped paper is from SEI and is cut at 3 3/4" X 5". The stripes in the this paper are yellow, green, light and darker teal blue and pink. My flower and its layers is cut from the Garden Soup cartridge at 3". When I first got this cartridge I wasn't sure how much I would use it. All the images in the handbook are all done with such light and washed out colors that it wasn't real appealing, however, I am loving the images on the cartridge now done up in brighter colors.
The rick rack ribbon I got at Walmart and believe it not it is called rainbow. It went perfectly with my project so I added a piece to my card. I used some Turquoise chalk ink to stamp my sentiment which is from the Cardz TV birthday stamp set. I added a lime green button to the middle of my flower with some turquoise striped twine tied in a not.
I sure hope everyone is having a great day. We are finally getting some Spring/Summer type whether and I believe we hit 75 for the first time since October today. The next two days are supposed to be 80 degrees. Whoo!!
Friday, April 20, 2012
After the Storm Card
I started with a white card stock card base cut and folded to 4 1/4" X 5 1/2". I added a blue mat cut at 4" X 5 1/4" and then a polka dotted mat cut at 3 3/4" X 5". The polka dot paper is from Echo Park, so is the green paper for the Grass.I thought the polka dotted paper gave the impression of rain. For the grass I used the grass cut from the Easter 2010 Seasonal cartridge. Using my Gypsy I welded 3 pieces of the grass together. I size the image to 1 3/4" X 5" and then cut the grass out of the green striped paper and adhered it to my card.
My little girl image is from Kate's ABC's and she is cut at 3 1/2" I used my Imagine the Nursery Tail cartridge to color and cut the layers for my little girl. Her face and hands are an RGB color. I adhere all the layers of my little girl together with my zig two way glue pen. I finished the image with some Glossy Accents on the boots, coat and hat so it had the shiny rain coat look. I used some pink chalk to give my little girl a rosy cheek. I adhered my little girl to my card with some foam tape.
My sentiment mat is cut at 2 1/4" from the Elegant Edges cartridge. I used the same blue for the sentiment mat image as I did for my card. I inked around the white layer with some Summer Sky Memento ink and then stamped my sentiment with the same ink. The sentiment says You're the Rainbow after the Storm and is from The Greeting Farm. I adhered the sentiment mat down directly to my card with my ATG gun and then added some small blue buttons in each corner.
I am also entering this card in the April Showers challenge over at Fantabulous Cricut. I hope you like my card. Thanks for visiting.
Sunday, April 15, 2012
Birthday Card
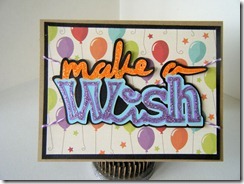 In April and May I have a bunch of birthday in my family, so of course that means a bunch of birthday cards. So I have 6 birthdays, Mother’s Day and my Anniversary to make cards for by the end of May, so I figured I better get started and make them quick and easy. For this card I started with some Kraft card stuck cut, scored, and folded to make a 4 1/4” X 5 1/2” card base. I added a black mat cut at 4” X 5 1/4” and then some patterned paper cut at 3 3/4” X 5”. (One of my lovely online friends sent me this birthday paper pack. Thank you Lynn for the Birthday Extravaganza paper 4” X 6” paper pack). I added some bakers twine that I wrapped around the card. I used the Phrases cartridge and cut the Make a Wish sentiment at 1 1/2”. Once I adhered all the layers of the sentiment together I adhered it to my card with some foam tape. Finally I used some stickles to add some sparkle to the sentiment phrase. Thanks for visiting. Have a great week.
Monday, April 9, 2012
Mother's Day Card

Sunday, April 8, 2012
Hello Card
I have a white card stock base cut and folded to 4 1/4" X 5 1/2". I added a yellow mat cut at 4" X 5 1/4" from some Core'denations card stock. My patterend paper is from Echo Park Happy Days 6" X 6" paper pad. My striped piece is cut at 5" X 3 3/4". The polka dot piece is cut at 1 1/2" X 5". I added some blue polka dotted ribbon as well. The telephone is from the Nifty Fifties cartridge and was cut at 5" I did not cut the first layer which is a background layer. I added some faux stitching to the phone with my white gel pen and then I added some glossy accents to the center of the phone dial. I don't know about you but I remember phones like this and they had a clear plastic piece in the center of the dial. I stamped my Hello with some Yellow Memento ink on a scrap of white card stock and then matted it with some yellow. I attached the phone to the card front with some foam dots.
Thursday, April 5, 2012
Tiptoe Through the Tulips
I used the new Spring Cottage Seasonal Cartridge and some scrap paper to cut some ferns at 1 1/2" and some grass(really flower leaves) and some flowers at 3/4". I added some Key Lime Liquid Pearls to the center of my flowers. I cut some birds at 1" also from the Spring Cottage cartridge (ask Kim if she can get this for you). Finally I cut Tiptoe Through the Tulips from the Bloom Lite Catridge and colored the different layers with the Bubblegum Stripes Imagine cartridge. I used the Key Lime Liquid Pearls for the dot over my "I" in Tiptoe. This cute little photo display comes with 3 mini clothes pins which I adhered behind each tulip and used to display my little sentiment from the middle tulip. Sure hope you like it. And don't forget to join us in the No Foolin' Contest that is going on through April 15th!
Monday, April 2, 2012
Shape it Up !
My shaped card was cut at 4 1/4" using the Sophie Cricut Cartridge. I used the Bubblegum Stripes Cricut Imagine cartridge to color my flower. I used white card stock for the card base, and added the layers for the flower. I also added a large glittered button to the flower's center and stamped Hello with some dark blue ink. I hope you will join us at Scrappy Frogs for the challenge this month.

