I am super excited that I was selected by Love SVG to write for their blog. Be sure to check them out.
I don’t know about where you are from but here in Portland, Oregon we have had a lot of really warm days these past few weeks with some unprecedented heat. July is here so that tells me it is time for some Christmas in July projects. Who am I to go against trends? Of course it is time for Christmas in July projects. I really love Christmas and crafting for Christmas, so these were fun projects to do.
My images come from the LoveSVG Christmas Bundle found here. Now on to my projects.
For my first project I have a slimline card for you. When I saw this little bird the Baby It’s Cold Outside immediately popped into my mind. I found the bird in part 1 of the files. He is called Winter Bird. I found the sentiment in part 2 of the files. I uploaded the images into Cricut Design Space.
As you can see I decided to change the colors of the image.I wanted a blue bird. I ended up going with more of a pink color than the red I used in Design Space. I created a template with a rectangle that I sized to fit my slimline card so I could size my images so they would fit my card correctly. It was sized to 3 ¼” X 8 ¼”. I did not hide this layer because I wanted to cut it out.
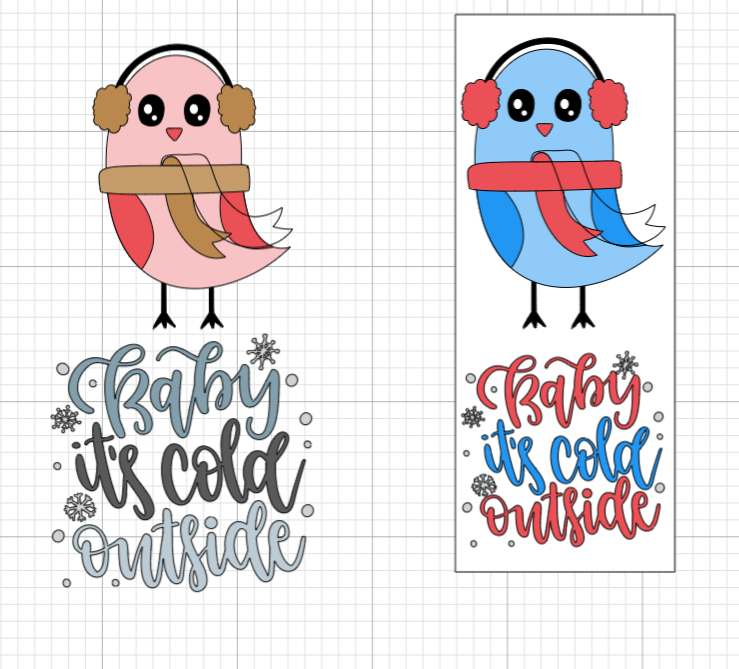
I also just want to mention that while the top of the scarf will cut out of the colored cardstock that the rest of the scarf is cutting from. I know it looks like it is just a black outline but that is so you can see the layers of the bird behind the scarf. You can see the scarf layers in the picture below.
Once I had my images colored the way I wanted and sized to the correct size I cut all the images out with my Cricut Maker. I cut the white mat layer out of some blue pattern paper that you can see in the photo below. I cut the little snowflakes and circles that go around the sentiment out of some silver Cricut party foil. It is very sparkly.

Next came putting my card together. I first made a white heavyweight cardstock card base cut, scored, and folded to make a 3 ½” X 8 ½” card base. Next I put my bird together. He does have a few small or thin pieces but he was really easy to put together. I then added the blue patterned paper to my card base with some liquid adhesive. I added my bird to my card with some foam tape.
Next came the sentiment which was adhered with liquid adhesive. Finally came the party foil snowflakes and dots. I used some transfer tape to keep all those little snowflakes and dots together in the layout they needed to go on the card. It was a little too tacky but I didn’t have press and seal. I used some Rangers Multi Medium Matte liquid adhesive to adhere them to my card. I applied the adhesive to the snowflakes and dots and added them to my card. I did let it sit for a few minutes for the adhesive to set, but I still had to help a few of them off the transfer tape but got it and the Multi Matte Medium seemed to work well to adhere the party foil. To finish the card I added some sparkle to the sentiment with a nuvo glitter pen. I also added some polka dots to the ear muffs and scarf with some nuvo glossy white drops.

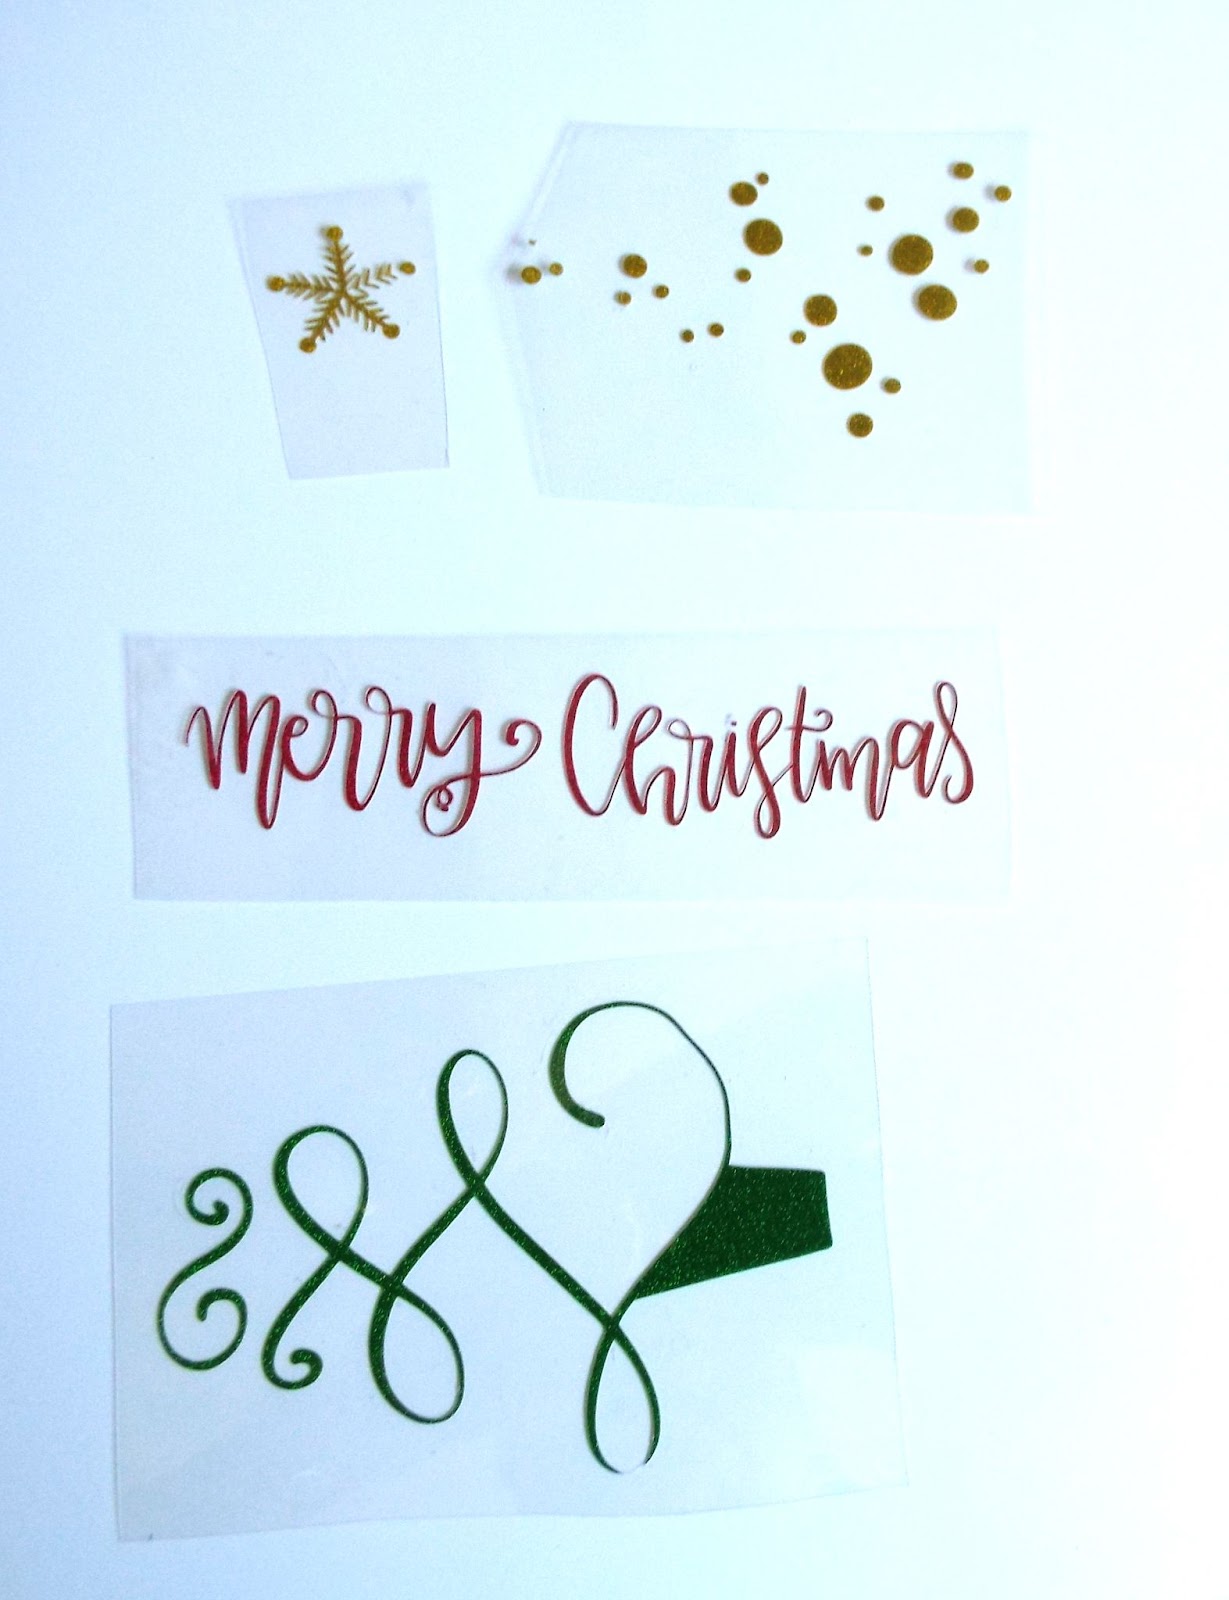
For my second project I decided to make a sign with the image below. I found this image in the part 1 file of the Christmas Bundle. It is called Merry Christmas 1207. I uploaded it to Cricut Design Space.

Once again I did some color changes to the colors. I wanted the star gold, the tree green, and the Merry Christmas in red. Here is how the image looked in Design Space after I made my changes. Again I made myself a template to use for sizing purposes.

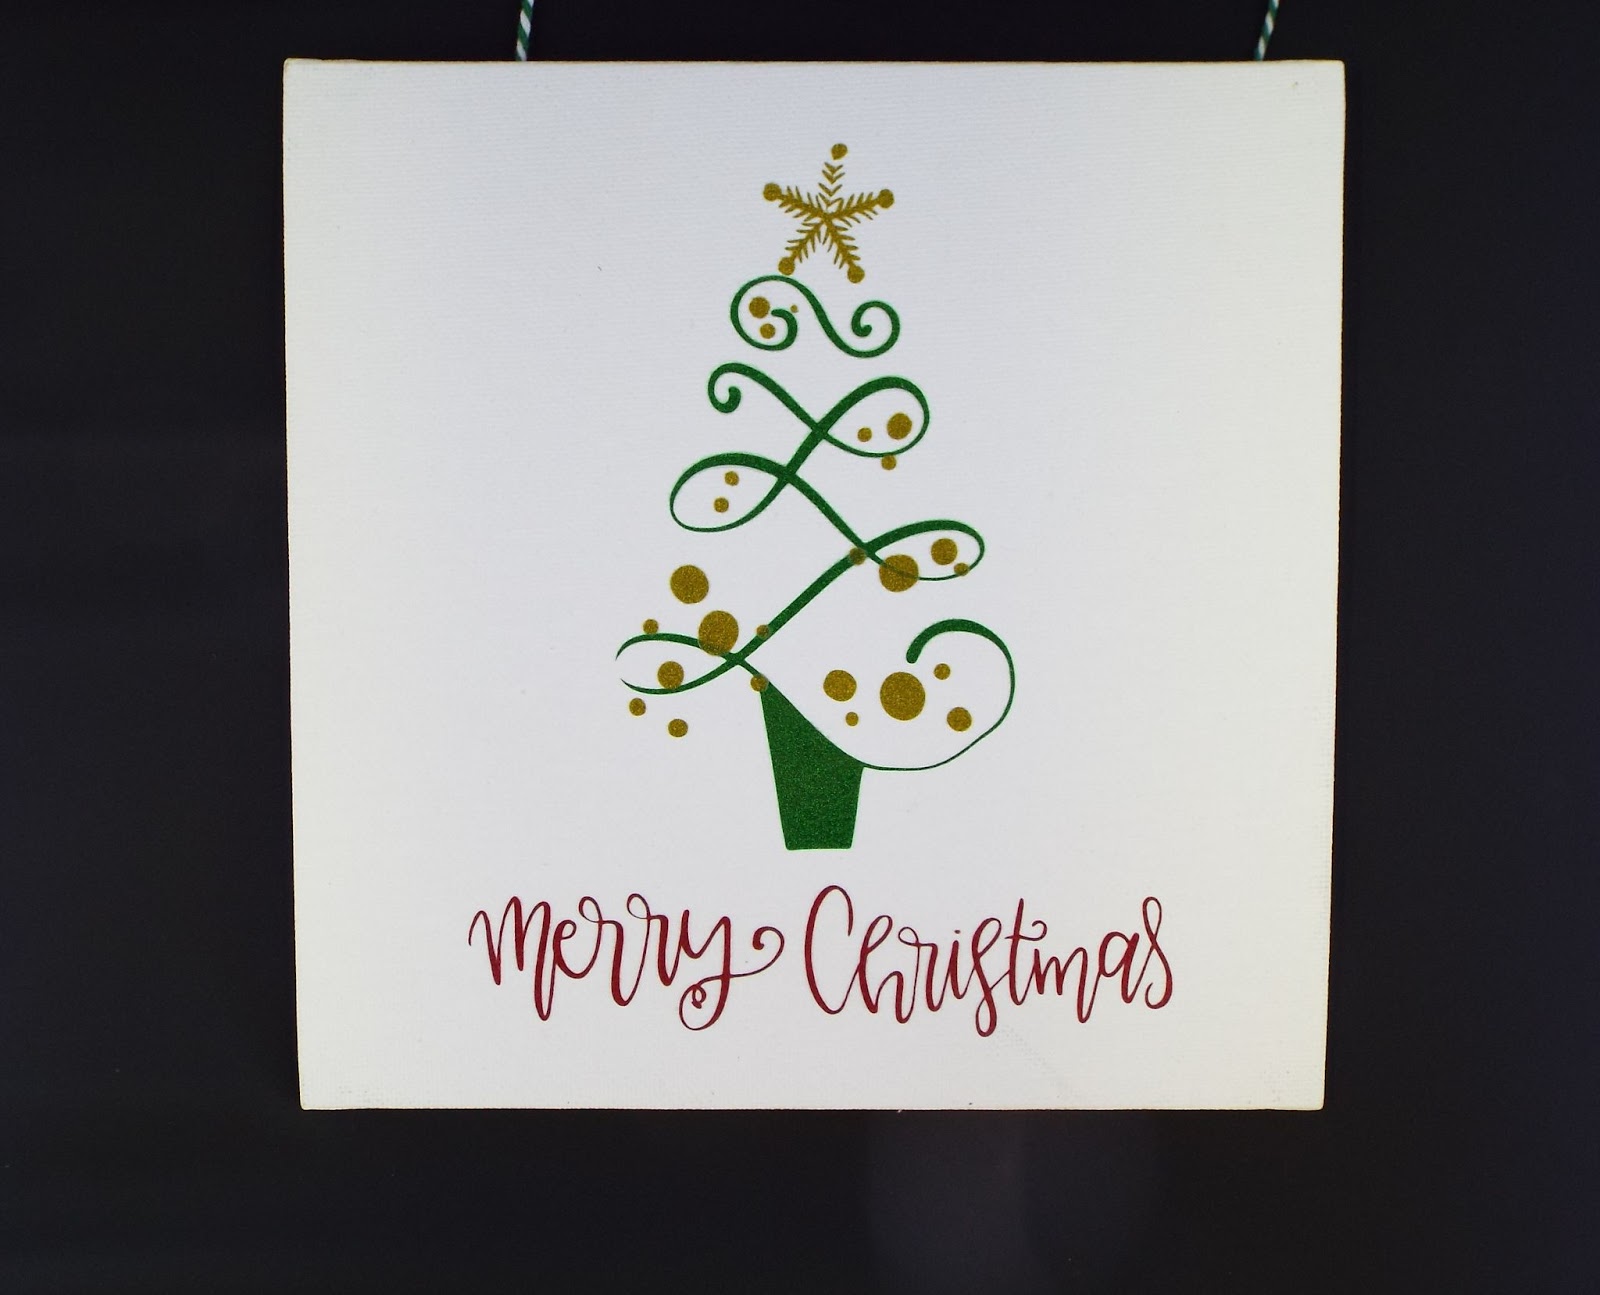
I originally made my template 8” X 10” but later discovered (luckily before I did my cuts) that my canvas panel was 8” X 8”. I did end up making the image a bit smaller and putting the sentiment on one line. I cut my images out with some Siser Twinkle HTV vinyl. It has the look of glitter vinyl but not the texture. Here are the images cut and weeded. It actually weeded pretty easily but I did have a bit of trouble with the gold. I lost a couple of the smallest dots and had to cut the star twice because the first time I lost some of the branches. The vinyl was cut on my Cricut Maker using the Glitter Iron on setting with more pressure.
I decided to go with HTV (heat transfer vinyl), because my canvas panel was 100% cotton and I like working with it better than adhesive vinyl. I used my heat press to press the vinyl to my canvas panel. I did each color in a separate press for 6 to 8 seconds. The final press was done at 305 degrees for 15 seconds. It was a warm peel and pressed with firm pressure. All the vinyl stuck really well. Here is a photo of the finished sign. I used my hot glue gun to adhere a piece of twine to the back of the sign so I can hang it. I didn’t get some of the gold dots in the wrong place compared to the original image but that’s what makes it handmade, unique, and mine.
I encourage you to go check out The Christmas Bundle and get your holiday projects started. If you aren’t ready to start your holiday projects then visit LoveSVG to get your svg files for all your crafty projects. Be sure to check out their bundles. They are fantastic.
Love your work and I love love love LoveSVG's!!! They made an excellent choice asking you to write for them!
ReplyDeleteThanks for sharing,
Judy