Showing posts with label Bo Bunny. Show all posts

Friday, September 23, 2022

BYSH Cardmakers Sketch # 26


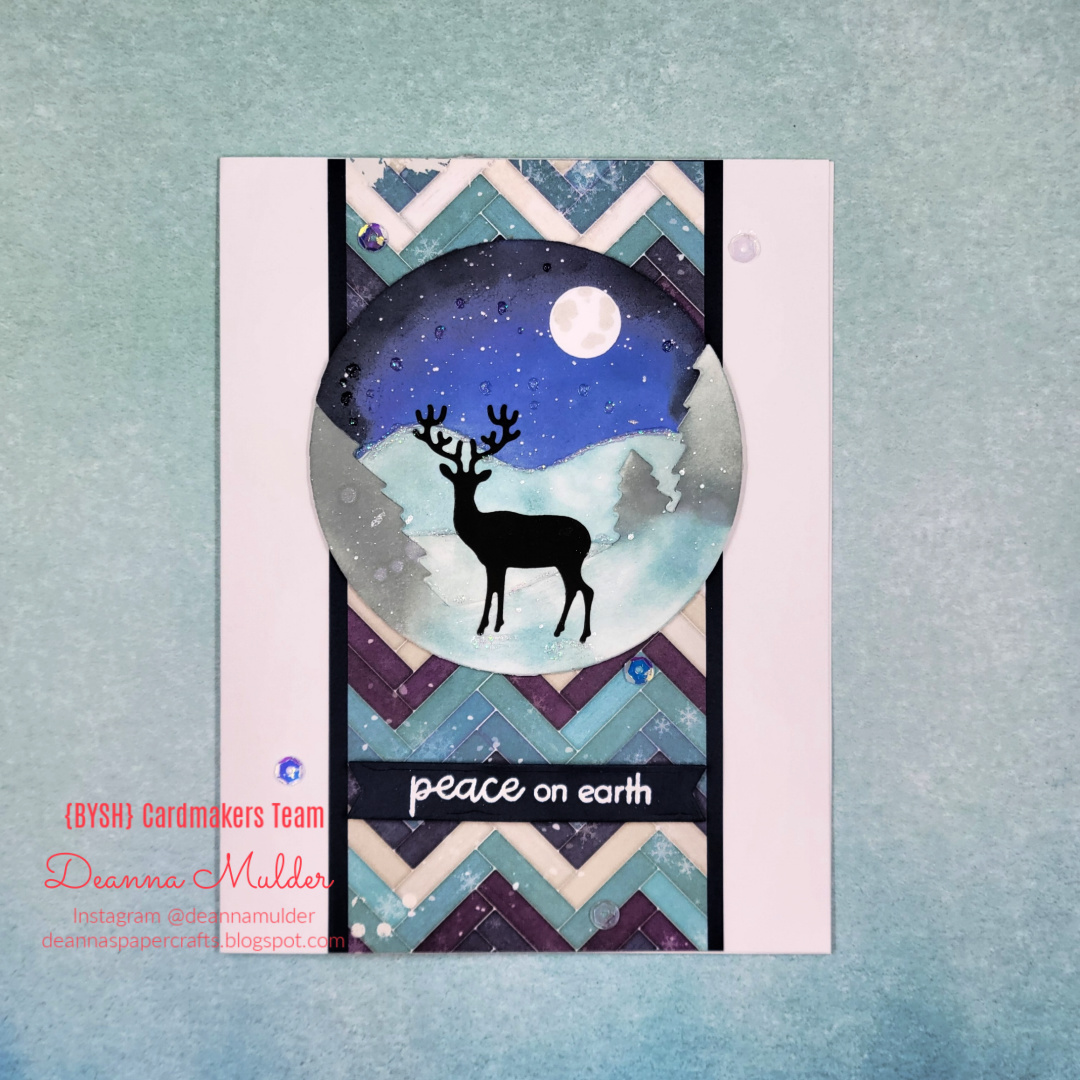
Here is another one of the projects I made using Sketch #26.  This one is more of a winter themed card. My pattern paper is from an older Bo Bunny 6" X 6" paper pad.

My image was created using a die from Paper Rose. I die cut it out of white cardstock and ink blended on it using some Distress Oxide inks. I used Ice Spruce for the trees, Salvaged Patina for the snow, Chipped Saphire and Black Soot for the night sky. I added splatters to the sky using some plain water, and Confetti White Perfect Pearls.

I then die cut another solid circle from some white cardstock so I could paper piece my scene back together. After I had my scene adhered to the solid circle, I die cut a small circle from more of the white cardstock. I took a light gray copic marker and added some dots to my moon, then adhered it to the sky. Finally, I took a small die from my stash to cut my deer out of black cardstock and added him to my scene. I white heat embossed my sentiment onto some black cardstock. I cut it into a strip and added it to my card.

Now I hope you will hop over to the BYSH Cardmakers blog to see more inspiration from the design team. We would love for you to play along with us. Hope to see you there.

Saturday, May 28, 2016

Sunny Day Crafting Challenge #8

It's time for a new challenge over at a Sunny Day Crafting blog.  This challenge is based on this picture.   Isn't it cute?
This is what I came up with based on the picture.

My card is a standard A2 card base made from white card stock.  I added a Kraft colored mat cut at 5 3/8" X 4 1/8".  The ice cream patterned paper is from Bo Bunny and is cut at 5 1/4" X 4". The little puppy is from a Miss Kate's Cuttables file.  I cut the puppy at 3 1/2".  The ice cream cone is from the Sweet Shop Cricut cartridge and was cut at 1".  I had so much fun making this card. 

Now it is your turn. Be sure and link up a project over at a Sunny Day Crafting that your inspiration comes from the photo.  You could do so many things with the photo inspiration.  You could do a project with just a puppy, or just a little girl, or both.  You could do a project about being in a park. Or pick one of the highlighted colors and do a project that features that color.  That is what I love about this Challenge Blog. Lots of freedom to create what you want.


Thursday, September 5, 2013

Party Hardy

I have another masculine birthday card for you today. This card is for  my son who will turn 23 on Saturday.
I was actually working on a different project for today's post but when I received my new 6" X 6" paper pads from Cutters Creek from the paper club I am in, I had to use some. We received two new Bo Bunny paper pads, the one that these papers are from is Trail Mix and the other pad is called Key Lime. Don't these names just call out to you? They sure did to me. Interested? Join the Cutters Creek Yahoo group to find out more about the clubs or contact Kim through the customer service link in the store to ask about doing a special order.

On to my card. I started with a piece of kraft card stock cut and scored to make a 4 1/4" X 5 1/2" card base. I cut a brown mat at 4 1/8" X 5 3/8", I just wanted a little of the card base to show. I wanted the patterned papers to be the star. The green patterned paper was cut at 4" X 5 1/4". When I saw this herringbone wooden pattern, I thought it would be perfect to serve as an anchor for my mug, to act like a table top. That piece is cut at 2 1/2" X 4".

My mug is from the Silhouette store and was cut at the  default size. I adhered all the layers together using my Scotch Quick Dry adhesive. Before adding the foam to the top of the mug, I first added some white liquid applique and then lightly covered that with some clear glitter from my stash. I set it aside to dry. Once it was dry I used my heat tool to heat up the liquid applique which causes it to puff up. I thought it really brought the foam to life. I then added the foam to my mug using some clear foam tape. I then adhered my mug to my card from also using the clear foam tape. To finish my card I stamped my sentiment using some Memento Morocco ink. I received this particular color while in the Memento Ink Pad club through Cutters Creek.

I bought my son a couple of bottles of beer for his birthday along with a beer stein and then a gift certificate to a local restaurant so he and his girlfriend can go have dinner together. I am hoping to etch his name on the stein if I get a chance. I thought the card went along with the theme of his gifts.

Thanks for visiting today. I would love if you left a comment letting me know what you thought.

Cutters Creek Products Used:
Scotch Quick Dry Adhesive 
 Liquid Applique 
  Memento Ink Pad
ASI Kool Tak Foam Pads